前言
本文档是在docker的环境在搭建redis主从模式。
这个跟redis集群不是量级别,redis主从模式只是小case的集群,不包含晦涩难懂的分布式概念, 也没有像 Redis 集群规范 那样包含 Redis 集群的实现细节, 如果你打算深入地学习 Redis 集群的部署方法, 那么推荐你在阅读完这个教程之后, 再去看一看集群规范。
环境
系统环境
Microsoft Windows [版本 10.0.19042.928]
软件信息
>docker version
 Client: Docker Engine - Community
 Cloud integration: 1.0.2
 Version:           19.03.13
 API version:       1.40
 Go version:        go1.13.15
 Git commit:        4484c46d9d
 Built:             Wed Sep 16 17:00:27 2020
 OS/Arch:           windows/amd64
 Experimental:      false
error during connect: Get http://%2F%2F.%2Fpipe%2Fdocker_engine/v1.40/version: open //./pipe/docker_engine: The system cannot find the file specified. In the default daemon configuration on Windows, the docker client must be run elevated to connect. This error may also indicate that the docker daemon is not running.

> docker-compose version
docker-compose version 1.27.4, build 40524192
docker-py version: 4.3.1
CPython version: 3.7.4
OpenSSL version: OpenSSL 1.1.1c  28 May 2019
正文
Redis主从复制简单介绍
为了使得集群在一部分节点下线或者无法与集群的大多数节点进行通讯的情况下, 仍然可以正常运作, Redis 集群对节点使用了主从复制功能: 集群中的每个节点都有 1 个至 N 个复制品(replica), 其中一个复制品为主节点(master), 而其余的 N-1 个复制品为从节点(slave)。
Redis主从复制的常用的几种方式
- 一主二仆 A(B、C) 一个Master两个Slave
- 薪火相传(去中心化)A - B - C ,B既是主节点(C的主节点),又是从节点(A的从节点)
- 反客为主(主节点down掉后,手动操作升级从节点为主节点) & 哨兵模式(主节点down掉后,自动升级从节点为主节点)
本次主要介绍一主二仆,和反客为主的操作,薪火相传不做介绍。哨兵模式后面专门写一篇进行介绍!
本教程是使用docker环境搭建redis群集主从复制模式。
环境说明:
| 名称 | 对应IP | redis版本 |
|---|---|---|
| master | 172.19.0.10 | Redis server v=6.0.10 sha=00000000:0 malloc=jemalloc-5.1.0 bits=64 build=66898bb7acd47e81 |
| slave_1 | 172.19.0.11 | Redis server v=6.0.10 sha=00000000:0 malloc=jemalloc-5.1.0 bits=64 build=66898bb7acd47e81 |
| slave_2 | 172.19.0.12 | Redis server v=6.0.10 sha=00000000:0 malloc=jemalloc-5.1.0 bits=64 build=66898bb7acd47e81 |
以上环境在是docker环境生成
前期准备:
docker和docker-compsoe的安装,这里就不在介绍
正文
以下的文件夹名为:Redis_master_slave_docker
1、Reids配置
模板配置master和slave1和slave2三个配置文件,详细的配置文件可参考Redis Safety Init Configuration和Redis Common Configuration
配置master
新建redis-master.conf文件,
# bind 127.0.0.1

# 启用保护模式
# 即在没有使用bind指令绑定具体地址时
# 或在没有设定密码时
# Redis将拒绝来自外部的连接
# protected-mode yes

# 监听端口
port 6379

# 启动时不打印logo
# 这个不重要,想看logo就打开它
always-show-logo no

# 设定密码认证
requirepass 123456

# 禁用KEYS命令
# 一方面 KEYS * 命令可以列出所有的键,会影响数据安全
# 另一方面 KEYS 命令会阻塞数据库,在数据库中存储了大量数据时,该命令会消耗很长时间
# 期间对Redis的访问也会被阻塞,而当锁释放的一瞬间,大量请求涌入Redis,会造成Redis直接崩溃
rename-command KEYS ""

# 此外还应禁止 FLUSHALL 和 FLUSHDB 命令
# 这两个命令会清空数据,并且不会失败
配置slave1
新建redis-slave1.conf文件
# bind 127.0.0.1

# 启用保护模式
# 即在没有使用bind指令绑定具体地址时
# 或在没有设定密码时
# Redis将拒绝来自外部的连接
# protected-mode yes

# 监听端口
port 6380

# 启动时不打印logo
# 这个不重要,想看logo就打开它
always-show-logo no

# 设定密码认证
requirepass 123456

# 禁用KEYS命令
# 一方面 KEYS * 命令可以列出所有的键,会影响数据安全
# 另一方面 KEYS 命令会阻塞数据库,在数据库中存储了大量数据时,该命令会消耗很长时间
# 期间对Redis的访问也会被阻塞,而当锁释放的一瞬间,大量请求涌入Redis,会造成Redis直接崩溃
rename-command KEYS ""

# 此外还应禁止 FLUSHALL 和 FLUSHDB 命令
# 这两个命令会清空数据,并且不会失败

# 配置master节点信息
# 格式:
#slaveof <masterip> <masterport>
# 此处masterip所指定的redis-server-master是运行master节点的容器名
# Docker容器间可以使用容器名代替实际的IP地址来通信
slaveof 172.19.0.10 6379

# 设定连接主节点所使用的密码
masterauth "123456"
配置slave2
新建redis-slave2.conf文件
# bind 127.0.0.1

# 启用保护模式
# 即在没有使用bind指令绑定具体地址时
# 或在没有设定密码时
# Redis将拒绝来自外部的连接
# protected-mode yes

# 监听端口
port 6381

# 启动时不打印logo
# 这个不重要,想看logo就打开它
always-show-logo no

# 设定密码认证
requirepass 123456

# 禁用KEYS命令
# 一方面 KEYS * 命令可以列出所有的键,会影响数据安全
# 另一方面 KEYS 命令会阻塞数据库,在数据库中存储了大量数据时,该命令会消耗很长时间
# 期间对Redis的访问也会被阻塞,而当锁释放的一瞬间,大量请求涌入Redis,会造成Redis直接崩溃
rename-command KEYS ""

# 此外还应禁止 FLUSHALL 和 FLUSHDB 命令
# 这两个命令会清空数据,并且不会失败

# 配置master节点信息
# 格式:
#slaveof <masterip> <masterport>
# 此处masterip所指定的redis-server-master是运行master节点的容器名
# Docker容器间可以使用容器名代替实际的IP地址来通信
slaveof 172.19.0.10 6379

# 设定连接主节点所使用的密码
masterauth "123456"
2、Docker-compose 配置
配置docker-compose
新建docker-compose.yml文件
version: '3'

services:
  # 主节点的容器
  redis-server-master:
    image: redis
    container_name: redis-server-master
    networks:
        app_net:
          ipv4_address: 172.19.0.10
    restart: always
    # 为了规避Docker中端口映射可能带来的问题
    # 这里选择使用host网络
    # network_mode: host
    # 指定时区,保证容器内时间正确
    environment:
      TZ: "Asia/Shanghai"
    volumes:
      # 映射配置文件和数据目录
      - ./redis-master.conf:/usr/local/etc/redis/redis.conf
    #   - ./data/redis-master:/data
    sysctls:
      # 必要的内核参数
      net.core.somaxconn: '511'
    command: ["redis-server", "/usr/local/etc/redis/redis.conf"]
  # 从节点1的容器
  redis-server-slave-1:
    image: redis
    container_name: redis-server-slave-1
    networks:
        app_net:
          ipv4_address: 172.19.0.11
    restart: always
    # network_mode: host
    depends_on:
      - redis-server-master
    environment:
      TZ: "Asia/Shanghai"
    volumes:
      - ./redis-slave1.conf:/usr/local/etc/redis/redis.conf
    #   - ./data/redis-slave-1:/data
    sysctls:
      net.core.somaxconn: '511'
    command: ["redis-server", "/usr/local/etc/redis/redis.conf"]
  # 从节点2的容器
  redis-server-slave-2:
    image: redis
    container_name: redis-server-slave-2
    networks:
        app_net:
          ipv4_address: 172.19.0.12
    restart: always
    # network_mode: host
    depends_on:
      - redis-server-master
    environment:
      TZ: "Asia/Shanghai"
    volumes:
      - ./redis-slave2.conf:/usr/local/etc/redis/redis.conf
    #   - ./data/redis-slave-2:/data
    sysctls:
      net.core.somaxconn: '511'
    command: ["redis-server", "/usr/local/etc/redis/redis.conf"]


networks:
    app_net:
        driver: bridge
        ipam:
            driver: default
            config:
                - subnet: 172.19.0.0/24
启动容器
在docker-compose.yml这个配置文件的目录下执行
$ docker-compose up
redis-server-master is up-to-date
Starting redis-server-slave-1 ... done
Starting redis-server-slave-2 ... done
Attaching to redis-server-master, redis-server-slave-1, redis-server-slave-2
redis-server-slave-1    | 1:C 20 May 2021 15:12:03.282 # oO0OoO0OoO0Oo Redis is starting oO0OoO0OoO0Oo
redis-server-slave-1    | 1:C 20 May 2021 15:12:03.283 # Redis version=6.0.10, bits=64, commit=00000000, modified=0, pid=1, just started
redis-server-slave-1    | 1:C 20 May 2021 15:12:03.283 # Configuration loaded
redis-server-slave-1    | 1:S 20 May 2021 15:12:03.287 * Running mode=standalone, port=6380.
redis-server-slave-1    | 1:S 20 May 2021 15:12:03.287 # Server initialized
redis-server-slave-1    | 1:S 20 May 2021 15:12:03.287 # WARNING overcommit_memory is set to 0! Background save may fail under low memory condition. To fix this issue add 'vm.overcommit_memory = 1' to /etc/sysctl.conf and then reboot or
run the command 'sysctl vm.overcommit_memory=1' for this to take effect.
redis-server-slave-1    | 1:S 20 May 2021 15:12:03.287 # WARNING you have Transparent Huge Pages (THP) support enabled in your kernel. This will create latency and memory usage issues with Redis. To fix this issue run the command 'echo madvise > /sys/kernel/mm/transparent_hugepage/enabled' as root, and add it to your /etc/rc.local in order to retain the setting after a reboot. Redis must be restarted after THP is disabled (set to 'madvise' or 'never').
redis-server-slave-1    | 1:S 20 May 2021 15:12:03.291 * Loading RDB produced by version 6.0.10
redis-server-slave-1    | 1:S 20 May 2021 15:12:03.291 * RDB age 12156 seconds
redis-server-slave-1    | 1:S 20 May 2021 15:12:03.291 * RDB memory usage when created 1.83 Mb
redis-server-slave-1    | 1:S 20 May 2021 15:12:03.291 * DB loaded from disk: 0.000 seconds
redis-server-slave-1    | 1:S 20 May 2021 15:12:03.291 * Before turning into a replica, using my own master parameters to synthesize a cached master: I may be able to synchronize with the new master with just a partial transfer.
redis-server-slave-1    | 1:S 20 May 2021 15:12:03.291 * Ready to accept connections
redis-server-slave-1    | 1:S 20 May 2021 15:12:03.291 * Connecting to MASTER 172.19.0.10:6379
redis-server-slave-2    | 1:C 20 May 2021 15:12:03.298 # oO0OoO0OoO0Oo Redis is starting oO0OoO0OoO0Oo
redis-server-slave-2    | 1:C 20 May 2021 15:12:03.298 # Redis version=6.0.10, bits=64, commit=00000000, modified=0, pid=1, just started
redis-server-slave-2    | 1:C 20 May 2021 15:12:03.298 # Configuration loaded
redis-server-slave-1    | 1:S 20 May 2021 15:12:03.298 * MASTER <-> REPLICA sync started
redis-server-slave-1    | 1:S 20 May 2021 15:12:03.299 * Non blocking connect for SYNC fired the event.
redis-server-slave-1    | 1:S 20 May 2021 15:12:03.299 * Master replied to PING, replication can continue...
redis-server-slave-1    | 1:S 20 May 2021 15:12:03.300 * Trying a partial resynchronization (request fb988d4415776e5c74073176824df751a8378498:1).
redis-server-slave-2    | 1:S 20 May 2021 15:12:03.301 * Running mode=standalone, port=6381.
redis-server-slave-2    | 1:S 20 May 2021 15:12:03.302 # Server initialized
redis-server-slave-2    | 1:S 20 May 2021 15:12:03.302 # WARNING overcommit_memory is set to 0! Background save may fail under low memory condition. To fix this issue add 'vm.overcommit_memory = 1' to /etc/sysctl.conf and then reboot or
run the command 'sysctl vm.overcommit_memory=1' for this to take effect.
redis-server-slave-2    | 1:S 20 May 2021 15:12:03.302 # WARNING you have Transparent Huge Pages (THP) support enabled in your kernel. This will create latency and memory usage issues with Redis. To fix this issue run the command 'echo madvise > /sys/kernel/mm/transparent_hugepage/enabled' as root, and add it to your /etc/rc.local in order to retain the setting after a reboot. Redis must be restarted after THP is disabled (set to 'madvise' or 'never').
redis-server-slave-2    | 1:S 20 May 2021 15:12:03.304 * Loading RDB produced by version 6.0.10
redis-server-slave-2    | 1:S 20 May 2021 15:12:03.304 * RDB age 12156 seconds
redis-server-slave-2    | 1:S 20 May 2021 15:12:03.304 * RDB memory usage when created 1.83 Mb
redis-server-slave-2    | 1:S 20 May 2021 15:12:03.304 * DB loaded from disk: 0.000 seconds
redis-server-slave-2    | 1:S 20 May 2021 15:12:03.304 * Before turning into a replica, using my own master parameters to synthesize a cached master: I may be able to synchronize with the new master with just a partial transfer.
redis-server-slave-2    | 1:S 20 May 2021 15:12:03.304 * Ready to accept connections
redis-server-slave-2    | 1:S 20 May 2021 15:12:03.305 * Connecting to MASTER 172.19.0.10:6379
redis-server-slave-2    | 1:S 20 May 2021 15:12:03.308 * MASTER <-> REPLICA sync started
redis-server-slave-2    | 1:S 20 May 2021 15:12:03.308 * Non blocking connect for SYNC fired the event.
redis-server-slave-1    | 1:S 20 May 2021 15:12:03.304 * Full resync from master: e6e8fc293efae9825add50695f68d86b79df8bed:0
redis-server-slave-1    | 1:S 20 May 2021 15:12:03.304 * Discarding previously cached master state.
redis-server-slave-2    | 1:S 20 May 2021 15:12:03.309 * Master replied to PING, replication can continue...
redis-server-slave-2    | 1:S 20 May 2021 15:12:03.317 * Trying a partial resynchronization (request fb988d4415776e5c74073176824df751a8378498:1).
redis-server-master     | 1:C 20 May 2021 15:10:30.499 # oO0OoO0OoO0Oo Redis is starting oO0OoO0OoO0Oo
redis-server-master     | 1:C 20 May 2021 15:10:30.499 # Redis version=6.0.10, bits=64, commit=00000000, modified=0, pid=1, just started
redis-server-master     | 1:C 20 May 2021 15:10:30.499 # Configuration loaded
redis-server-master     | 1:M 20 May 2021 15:10:30.507 * Running mode=standalone, port=6379.
redis-server-master     | 1:M 20 May 2021 15:10:30.507 # Server initialized
redis-server-master     | 1:M 20 May 2021 15:10:30.507 # WARNING overcommit_memory is set to 0! Background save may fail under low memory condition. To fix this issue add 'vm.overcommit_memory = 1' to /etc/sysctl.conf and then reboot or
run the command 'sysctl vm.overcommit_memory=1' for this to take effect.
redis-server-master     | 1:M 20 May 2021 15:10:30.507 # WARNING you have Transparent Huge Pages (THP) support enabled in your kernel. This will create latency and memory usage issues with Redis. To fix this issue run the command 'echo madvise > /sys/kernel/mm/transparent_hugepage/enabled' as root, and add it to your /etc/rc.local in order to retain the setting after a reboot. Redis must be restarted after THP is disabled (set to 'madvise' or 'never').
redis-server-master     | 1:M 20 May 2021 15:10:30.509 * Loading RDB produced by version 6.0.10
redis-server-master     | 1:M 20 May 2021 15:10:30.509 * RDB age 12063 seconds
redis-server-master     | 1:M 20 May 2021 15:10:30.509 * RDB memory usage when created 1.83 Mb
redis-server-master     | 1:M 20 May 2021 15:10:30.509 * DB loaded from disk: 0.001 seconds
redis-server-master     | 1:M 20 May 2021 15:10:30.509 * Ready to accept connections
redis-server-master     | 1:M 20 May 2021 15:12:03.300 * Replica 172.19.0.11:6380 asks for synchronization
redis-server-master     | 1:M 20 May 2021 15:12:03.300 * Partial resynchronization not accepted: Replication ID mismatch (Replica asked for 'fb988d4415776e5c74073176824df751a8378498', my replication IDs are 'e1f56e12895196661bcd0a99387317f5823df291' and '0000000000000000000000000000000000000000')
redis-server-master     | 1:M 20 May 2021 15:12:03.300 * Replication backlog created, my new replication IDs are 'e6e8fc293efae9825add50695f68d86b79df8bed' and '0000000000000000000000000000000000000000'
redis-server-master     | 1:M 20 May 2021 15:12:03.300 * Starting BGSAVE for SYNC with target: disk
redis-server-master     | 1:M 20 May 2021 15:12:03.303 * Background saving started by pid 19
redis-server-master     | 1:M 20 May 2021 15:12:03.317 * Replica 172.19.0.12:6381 asks for synchronization
redis-server-master     | 1:M 20 May 2021 15:12:03.317 * Partial resynchronization not accepted: Replication ID mismatch (Replica asked for 'fb988d4415776e5c74073176824df751a8378498', my replication IDs are 'e6e8fc293efae9825add50695f68d86b79df8bed' and '0000000000000000000000000000000000000000')
redis-server-master     | 1:M 20 May 2021 15:12:03.317 * Waiting for end of BGSAVE for SYNC
redis-server-slave-2    | 1:S 20 May 2021 15:12:03.322 * Full resync from master: e6e8fc293efae9825add50695f68d86b79df8bed:0
redis-server-slave-2    | 1:S 20 May 2021 15:12:03.322 * Discarding previously cached master state.
redis-server-master     | 19:C 20 May 2021 15:12:03.323 * DB saved on disk
redis-server-master     | 19:C 20 May 2021 15:12:03.323 * RDB: 8 MB of memory used by copy-on-write
redis-server-slave-1    | 1:S 20 May 2021 15:12:03.353 * MASTER <-> REPLICA sync: receiving 176 bytes from master to disk
redis-server-slave-1    | 1:S 20 May 2021 15:12:03.353 * MASTER <-> REPLICA sync: Flushing old data
redis-server-master     | 1:M 20 May 2021 15:12:03.353 * Background saving terminated with success
redis-server-master     | 1:M 20 May 2021 15:12:03.353 * Synchronization with replica 172.19.0.11:6380 succeeded
redis-server-slave-2    | 1:S 20 May 2021 15:12:03.354 * MASTER <-> REPLICA sync: receiving 176 bytes from master to disk
redis-server-slave-1    | 1:S 20 May 2021 15:12:03.355 * MASTER <-> REPLICA sync: Loading DB in memory
redis-server-slave-2    | 1:S 20 May 2021 15:12:03.354 * MASTER <-> REPLICA sync: Flushing old data
redis-server-slave-2    | 1:S 20 May 2021 15:12:03.355 * MASTER <-> REPLICA sync: Loading DB in memory
redis-server-master     | 1:M 20 May 2021 15:12:03.354 * Synchronization with replica 172.19.0.12:6381 succeeded
redis-server-slave-1    | 1:S 20 May 2021 15:12:03.361 * Loading RDB produced by version 6.0.10
redis-server-slave-1    | 1:S 20 May 2021 15:12:03.361 * RDB age 0 seconds
redis-server-slave-1    | 1:S 20 May 2021 15:12:03.361 * RDB memory usage when created 1.83 Mb
redis-server-slave-2    | 1:S 20 May 2021 15:12:03.361 * Loading RDB produced by version 6.0.10
redis-server-slave-2    | 1:S 20 May 2021 15:12:03.361 * RDB age 0 seconds
redis-server-slave-2    | 1:S 20 May 2021 15:12:03.361 * RDB memory usage when created 1.83 Mb
redis-server-slave-2    | 1:S 20 May 2021 15:12:03.362 * MASTER <-> REPLICA sync: Finished with success
redis-server-slave-1    | 1:S 20 May 2021 15:12:03.362 * MASTER <-> REPLICA sync: Finished with success
打印日志出现MASTER <-> REPLICA sync: Finished with success这个标示初步同步成功,如果出现报错,请自行分析出现原因,此处不在讲述。
启动成功以后使用docker ps查看一下容器状态
>docker ps
CONTAINER ID        IMAGE               COMMAND                  CREATED             STATUS              PORTS               NAMES
56403fa33944        redis               "docker-entrypoint.s…"   4 minutes ago       Up 4 minutes                            redis-server-slave-2
1d9121cd3b98        redis               "docker-entrypoint.s…"   4 minutes ago       Up 4 minutes                            redis-server-slave-1
31c876155956        redis               "docker-entrypoint.s…"   4 minutes ago       Up 4 minutes                            redis-server-master
3、主从模式验证
查看状态
客户端连接上master服务器,使用info replication命令查看其从服务器连接
> docker exec -it redis-server-master /bin/bash
root@docker-desktop:/data# ls
dump.rdb
root@docker-desktop:/data# redis-cli -h 127.0.0.1 -p 6379
127.0.0.1:6379> AUTH 123456
OK
127.0.0.1:6379> info replication
# Replication
role:master
connected_slaves:2
slave0:ip=127.0.0.1,port=6381,state=online,offset=896,lag=1
slave1:ip=127.0.0.1,port=6380,state=online,offset=896,lag=1
master_replid:fb988d4415776e5c74073176824df751a8378498
master_replid2:0000000000000000000000000000000000000000
master_repl_offset:896
second_repl_offset:-1
repl_backlog_active:1
repl_backlog_size:1048576
repl_backlog_first_byte_offset:1
repl_backlog_histlen:896
connnected_slave:2 表示现在有两个从服务器正常连接 slave0和slave1分别显示两个从服务器的ip和port,以及偏移量等等
建议输入命名禁止明文输出。
判断从服务器是否只读
> docker exec -it redis-server-slave-1 /bin/bash
root@docker-desktop:/data# redis-cli -h 127.0.0.1 -p 6380
127.0.0.1:6380> AUTH 123456
OK
127.0.0.1:6380> set b 200
(error) READONLY You can't write against a read only replica.
在主服务器上设置一个值,从服务器能否同步
master:
> set a 250
OK
127.0.0.1:6379> get a
"250"
slave1:
127.0.0.1:6380> get a
"250"
slave2:
> docker exec -it redis-server-slave-2 /bin/bash
root@docker-desktop:/data# redis-cli -h 127.0.0.1 -p 6381
127.0.0.1:6381> AUTH 123456
OK
127.0.0.1:6381> GET a
"250"
redis主从复制原理
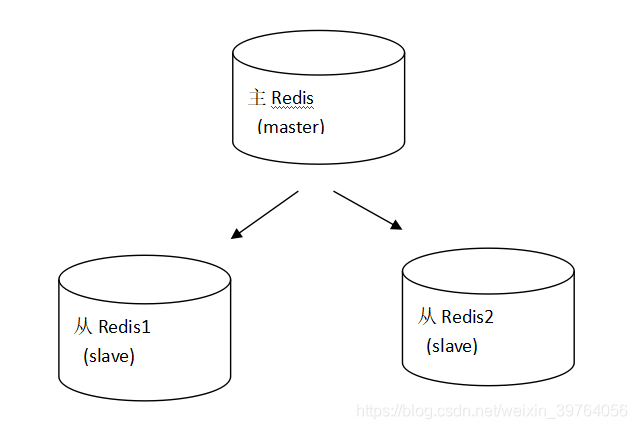
- 主redis中的数据有两个副本,即从redis1和从redis2,即使一台Redis服务器宕机其他两台Redis服务也可以继续提供服务
- 主redis中的数据和从redis中的数据保持实时同步,当主redis写入数据时通过主从复制机制会复制到两个从redis服务上
- 只有一个主redis,可以有多个从redis
- master和slave都是一个redis实例(redis服务)
- 通过主从配置可以实现读写分离
- 主从复制不会阻塞master,在同步数据时,master可以继续处理客户端请求